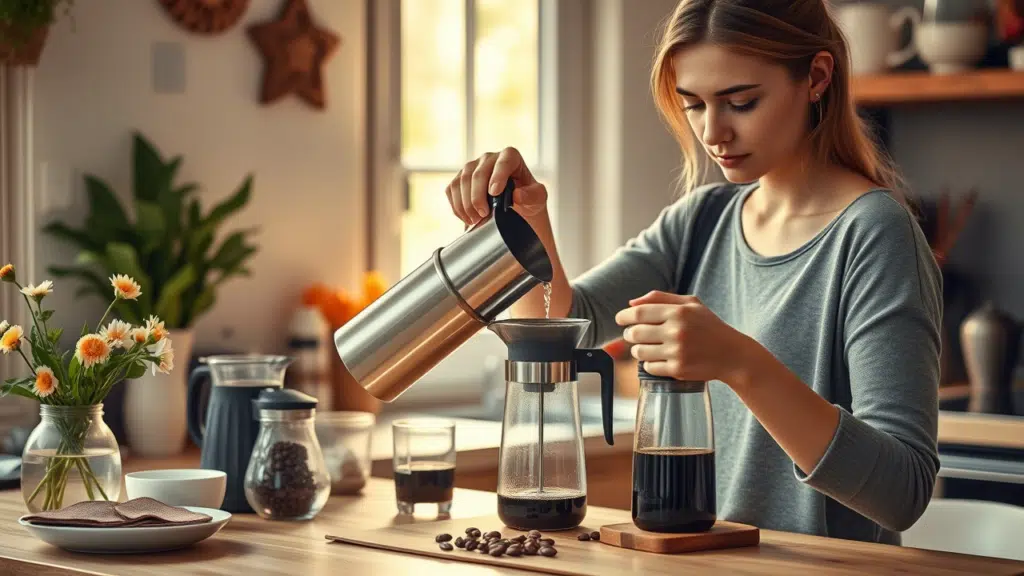
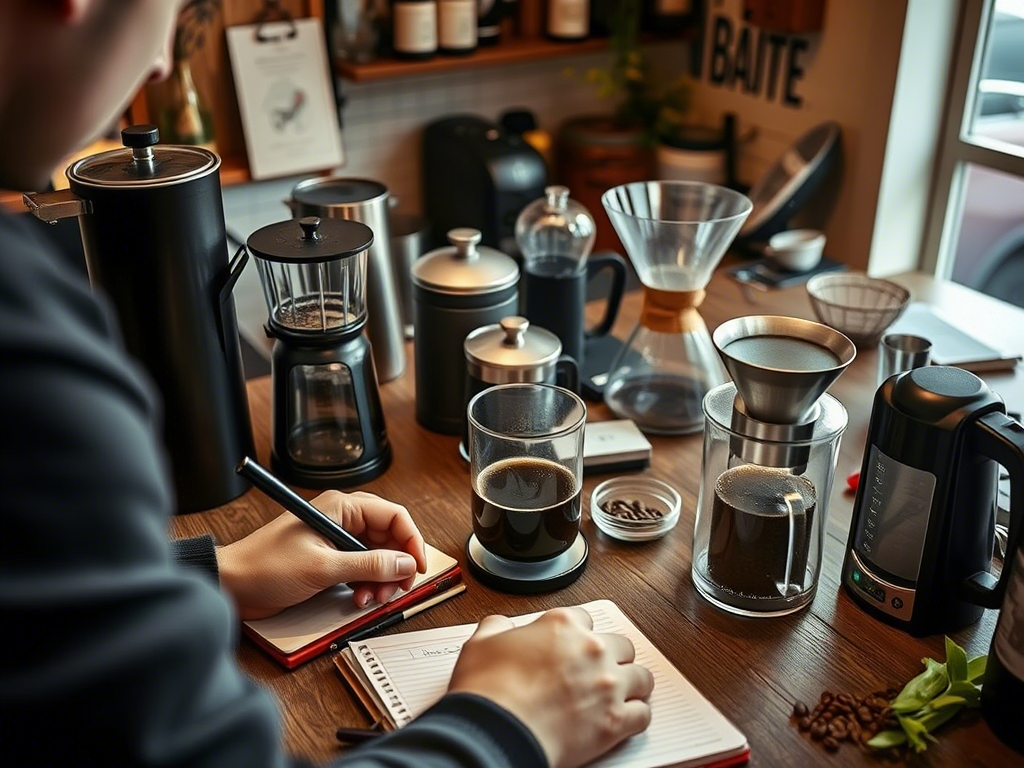
Brewing the perfect cup of coffee at home can be a deeply satisfying experience.
It’s not just about the aroma or the taste; it’s about the ritual, the moment of calm, and the joy of creating something delicious from scratch.
For years, I’ve been experimenting with different techniques, tools, and ingredients to refine my coffee-making process.
Along the way, I’ve learned that the journey to the perfect home coffee is as important as the final product itself.
The key to great coffee lies in attention to detail—choosing the right beans, storing them properly, and mastering the brewing method.
Whether you’re a seasoned coffee enthusiast or a beginner, there’s always room to improve.
In this blog post, I’ll share my personal experiences and insights to help you brew the best coffee possible.
From selecting high-quality coffee beans to understanding water temperature and equipment maintenance, I’ll guide you through each step.
Key Takeaways:
- Choosing the right coffee beans is crucial for flavor.
- Proper storage ensures freshness and enhances taste.
- Grinding beans just before brewing maximizes flavor extraction.
- The ideal coffee-to-water ratio and water temperature are essential for optimal extraction.
- Regular maintenance of your coffee equipment is key to consistent results.
- Experimentation is vital to find what works best for you.
Join me as we dive into the art and science of brewing the perfect cup of coffee at home. Let’s get started!
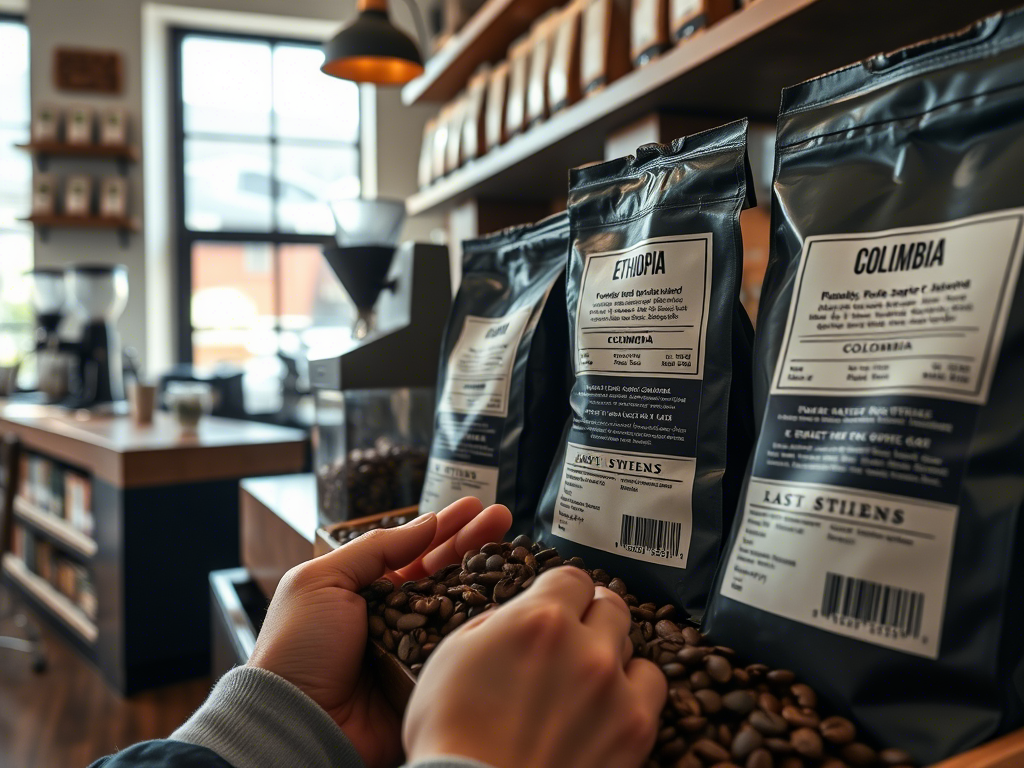
Choosing High-Quality Coffee Beans
When it comes to brewing the perfect cup of coffee at home, the quality of your coffee beans is the foundation.
Just like building a house, if you start with subpar materials, the end result won’t stand up.
The same goes for coffee—great beans mean great coffee.
So, how do you choose the right ones. First, consider the origin of the beans.
Coffee beans come from various regions around the world, each offering distinct flavors.
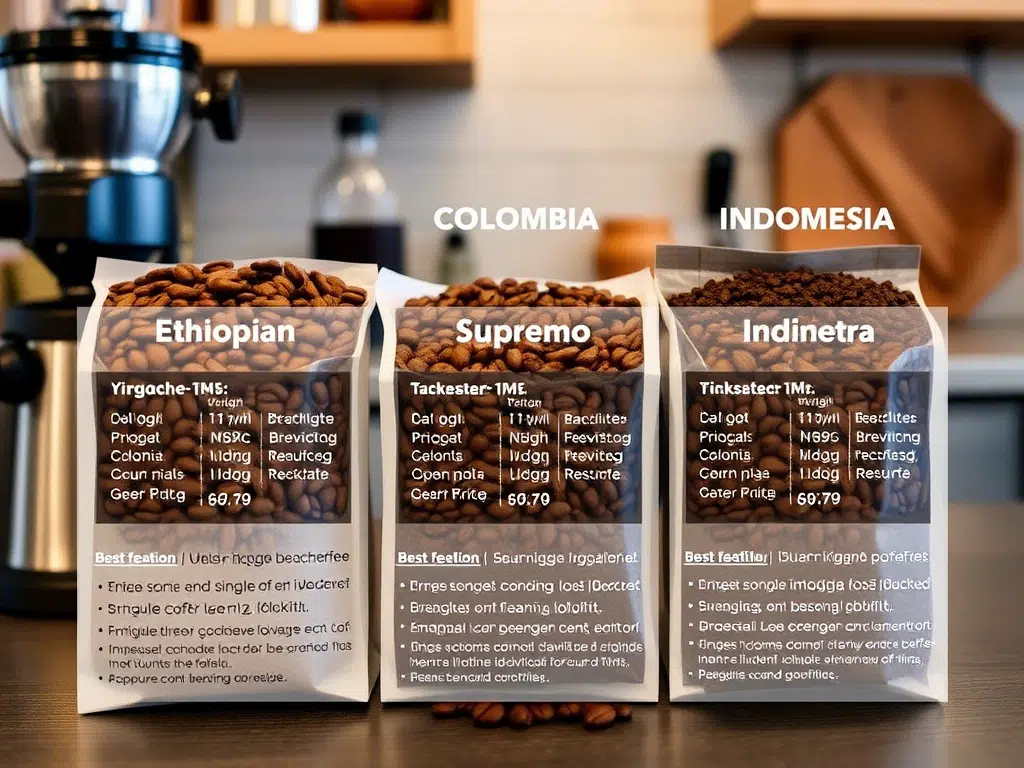
For example, beans from Ethiopia tend to have fruity and floral notes, while those from Colombia are often nuttier and more balanced.
Exploring different origins can be a fun adventure, allowing you to discover your favorite profiles.
Try single-origin beans first to appreciate the unique characteristics of each region before moving on to blends.
Look for freshly roasted beans, too.
Freshness is key because coffee beans start losing their flavor and aroma soon after roasting.
Ideally, you should buy whole beans from a local roaster who roasts in small batches.
This ensures the beans are as fresh as possible when they reach your kitchen.
If you’re unsure where to find fresh beans, check out local farmers markets or specialty coffee shops.
Many online retailers also offer freshly roasted beans delivered straight to your door.
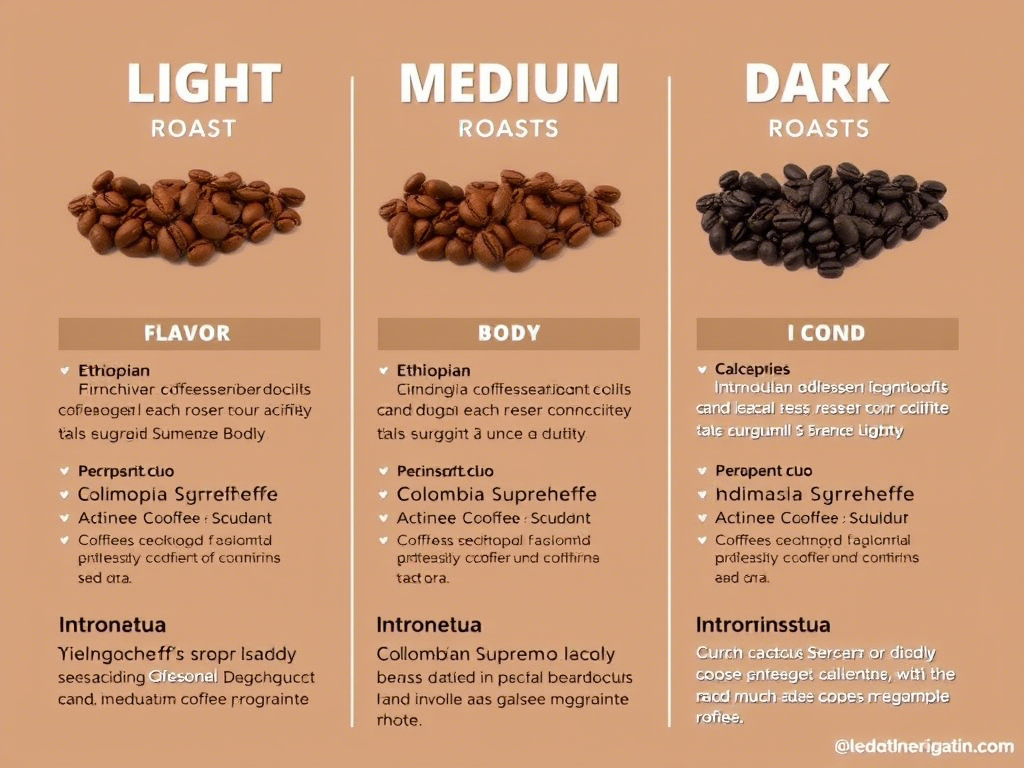
Another important factor is the roast level.
Light, medium, and dark roasts each bring different flavors to the table.
Light roasts preserve more of the bean’s natural acidity and complexity, while dark roasts have a richer, smokier taste.
Medium roasts strike a balance between the two.
Experiment with different roast levels to see what suits your palate best.
Comparing Roast Levels
| Roast Level | Flavor Profile | Acidity | Body |
| Light | Bright, fruity, floral | High | Light |
| Medium | Balanced, nutty, caramelized | Moderate | Medium |
| Dark | Rich, smoky, bittersweet | Low | Full |
Finding high-quality beans doesn’t have to break the bank.
Many small-batch roasters offer affordable options that rival larger brands in terms of quality.
Plus, supporting local businesses can be rewarding in its own right.
Remember, the goal isn’t just to drink coffee but to enjoy it.
Take your time, try different beans, and trust your taste buds.
In the next section, we’ll discuss how to properly store your coffee beans to maintain their freshness and flavor.
Proper Storage of Coffee Beans
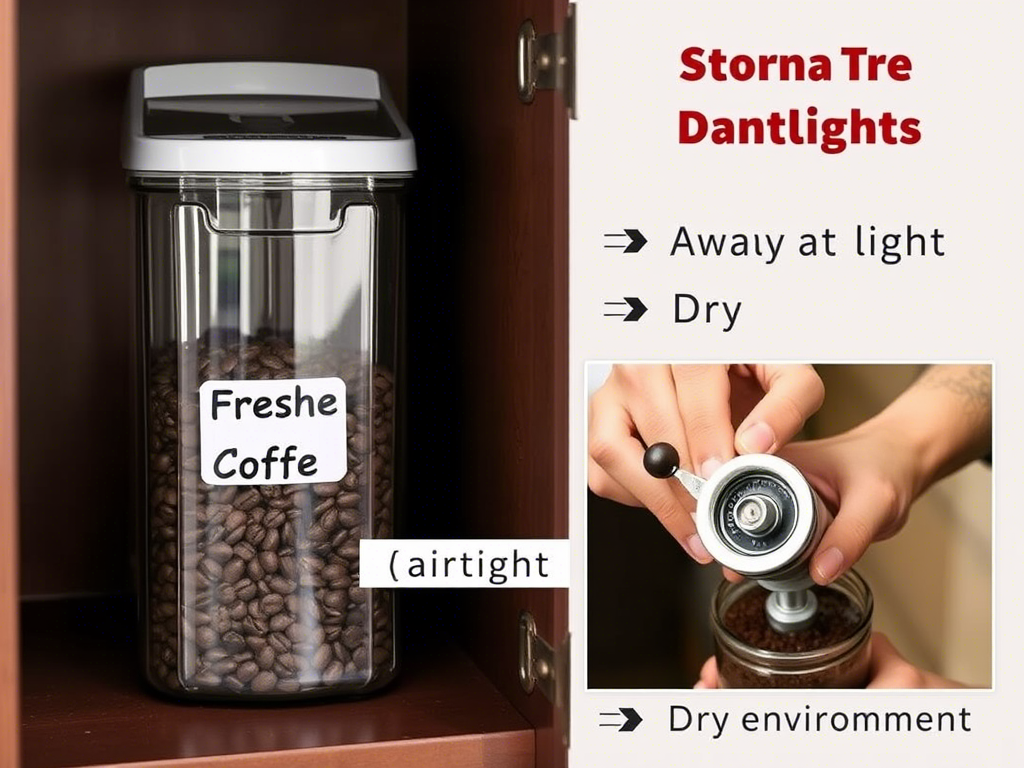
Once you’ve chosen your high-quality coffee beans, the next step is to ensure they stay fresh and flavorful.
Proper storage is crucial because even the best beans can lose their aroma and taste if not stored correctly.
Here’s how to keep your beans in top condition:.
First, avoid exposure to air, light, and moisture.
Coffee beans are highly perishable and can quickly degrade when exposed to these elements.
Store your beans in an airtight container away from direct sunlight and heat sources.
A pantry or a cool, dry cupboard works well, but avoid the refrigerator or freezer unless you plan to store large quantities for extended periods.
Freezing can cause condensation, leading to moisture buildup inside the container, which can affect the beans’ freshness.
Another tip is to grind your beans just before brewing.
Pre-ground coffee loses its flavor much faster than whole beans.
Grinding releases the oils and aromas, which begin to evaporate almost immediately.
By grinding right before you brew, you maximize the flavor extraction and ensure each cup tastes as fresh as possible.
To further extend the shelf life of your beans, consider portioning them out.
If you’re using a large bag of beans, transfer the unused portion to an opaque, airtight container after opening.
This helps prevent oxidation and keeps the remaining beans fresh for longer.
Some coffee enthusiasts even recommend vacuum-sealing unused beans to protect them from air exposure.
By following these simple steps, you can ensure your coffee beans stay fresh and flavorful, leading to a better cup of coffee every time.
In the next section, we’ll delve into the importance of grinding coffee beans just before brewing.
Grinding Coffee Beans Just Before Brewing
Grinding coffee beans just before brewing is one of the most critical steps in achieving the perfect cup of coffee.
It’s a small detail that can make a big difference in the taste and aroma of your coffee.
Here’s why timing matters and how to do it right:.
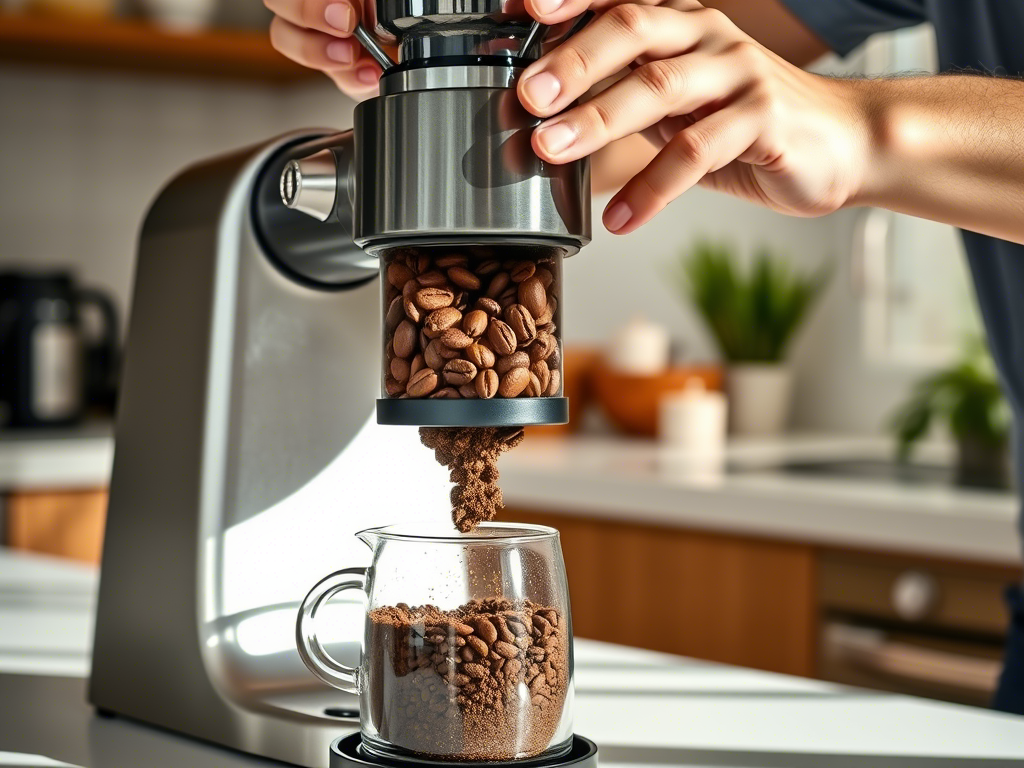
First, freshly ground coffee beans release their oils and aromatic compounds, which contribute to the rich flavor and aroma we love in a good cup of coffee.
These compounds are volatile and start to dissipate as soon as the beans are ground.
Waiting too long between grinding and brewing can lead to stale-tasting coffee.
To avoid this, always grind your beans just before you start the brewing process.
There are several types of grinders available, each suited for different brewing methods.
Blade grinders are affordable and easy to use, but they tend to produce inconsistent grounds, which can affect the extraction process.
Burr grinders, on the other hand, offer more precision and consistency, producing uniform particle sizes that result in a more even extraction.
If you’re serious about your coffee, investing in a burr grinder is worth considering.
Benefits of Grinding Just Before Brewing:
- Maximizes Flavor : Freshly ground beans retain their oils and aromatics.
- Enhances Aroma : The burst of fragrance right before brewing is part of the coffee experience.
- Consistent Extraction : Uniform particle size leads to better extraction.
- Avoids Stale Coffee : Prevents the loss of flavor and aroma over time.
Different brewing methods require different grind sizes.
For example, espresso requires a very fine grind, while French press calls for a coarse grind.
Adjusting the grind size according to your brewing method ensures optimal extraction and prevents over-extraction or under-extraction.
In the next section, we’ll explore the various brewing methods available, helping you find the one that suits your taste and lifestyle best.
Exploring Various Brewing Methods
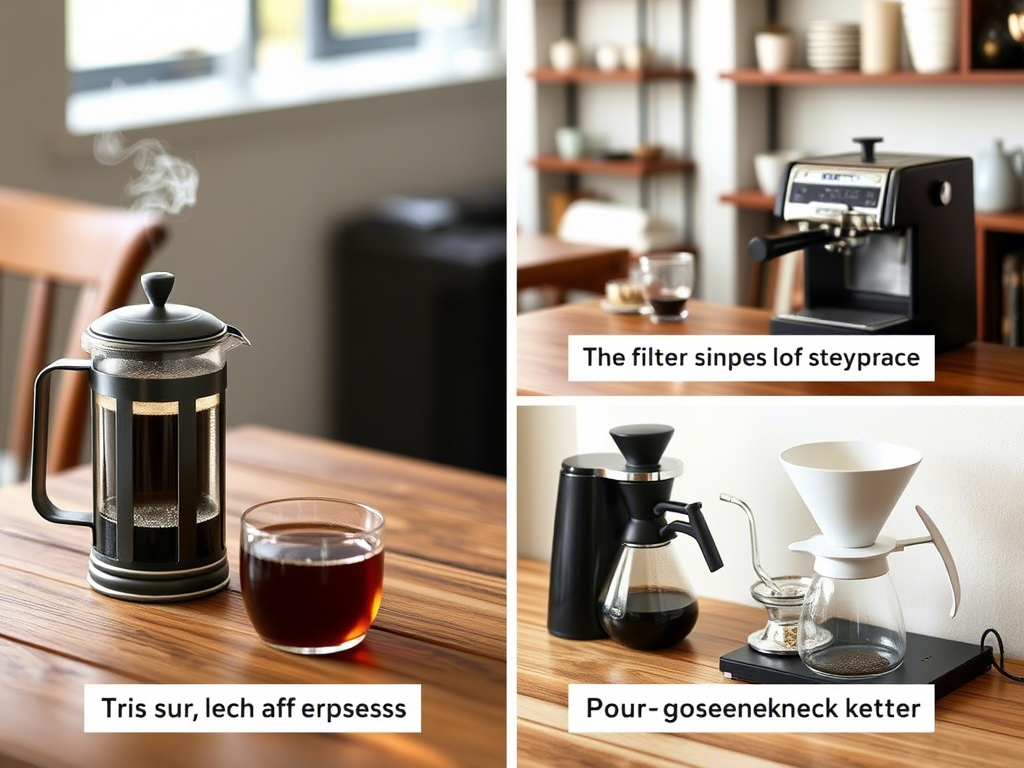
There are countless ways to brew coffee at home, each offering unique flavors and experiences.
Whether you prefer a quick and simple method or a more intricate process, there’s a brewing technique out there for everyone.
Let’s take a look at some of the most popular methods and how they can elevate your morning routine.
One of the simplest methods is the French press.
This classic device uses immersion brewing, where hot water is poured over coarsely ground coffee and left to steep for a few minutes before pressing.
The result is a rich, full-bodied cup with a slightly sedimentary texture.
French press coffee is ideal for those who enjoy a robust flavor and don’t mind a bit of grit.
It’s also a great option for people who want to minimize equipment clutter since it’s portable and doesn’t require electricity.
For a cleaner and more controlled extraction, many coffee lovers turn to the drip coffee maker.
These machines automatically pour hot water over finely ground coffee, allowing it to drip through a filter into a carafe.
Drip coffee is convenient and consistent, making it a go-to choice for busy mornings.
However, it’s essential to choose a high-quality machine that maintains the correct water temperature throughout the brewing process to ensure optimal extraction.
Another popular method is the espresso machine , which produces a concentrated shot of coffee by forcing hot water through finely ground coffee at high pressure.
Espresso is the base for many café favorites like lattes and cappuccinos.
While espresso machines can be expensive and require maintenance, they offer unparalleled control over the brewing process.
If you’re passionate about making café-quality drinks at home, an espresso machine might be worth the investment.
For those who enjoy a hands-on approach, the pour-over method is a fantastic option.
This technique involves manually pouring hot water over finely ground coffee in a paper or metal filter, allowing the water to slowly drip through and collect in a carafe below.
Pour-over coffee is known for its clarity and precision, resulting in a clean, nuanced flavor profile.
It requires a bit more attention but offers a rewarding experience for coffee enthusiasts.
Comparison of Brewing Methods:
| Method | Complexity | Equipment Needed | Flavor Profile | Ideal For |
| French Press | Simple | French press | Rich, full-bodied | Those who like robust flavor |
| Drip Coffee | Easy | Drip coffee maker | Balanced, smooth | Busy mornings |
| Espresso | Advanced | Espresso machine | Concentrated, intense | Café-quality drinks |
| Pour-Over | Intermediate | Pour-over dripper | Clean, nuanced | Hands-on coffee lovers |
Each method has its own charm and can cater to different preferences. In the next section, we’ll dive deeper into the pour-over technique, a favorite among many coffee aficionados.
Mastering the Pour-Over Technique
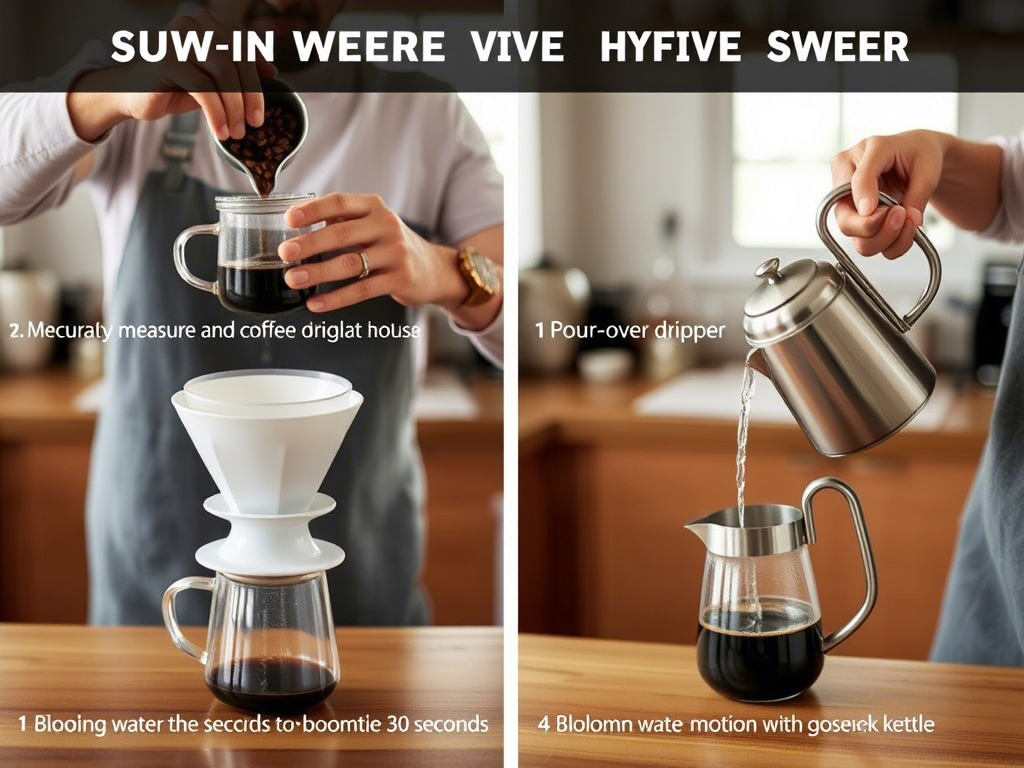
The pour-over method is beloved by coffee enthusiasts for its ability to produce a clean, nuanced cup of coffee.
It requires a bit more effort than other brewing methods, but the result is well worth it.
Let’s walk through the steps to master this technique.
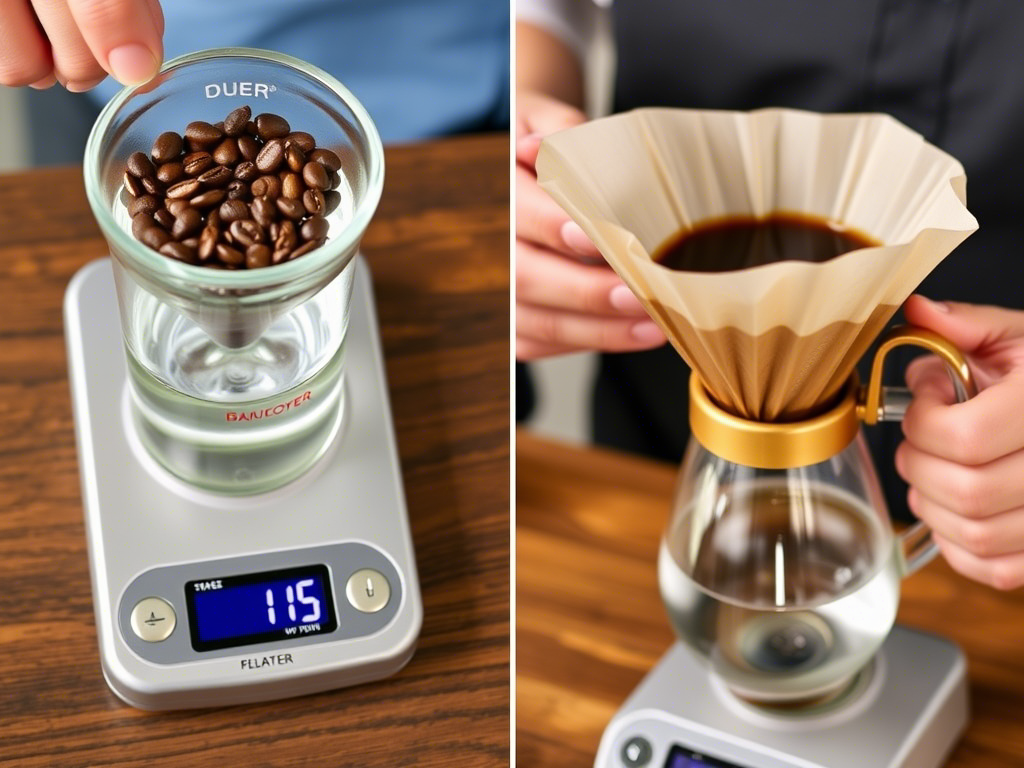
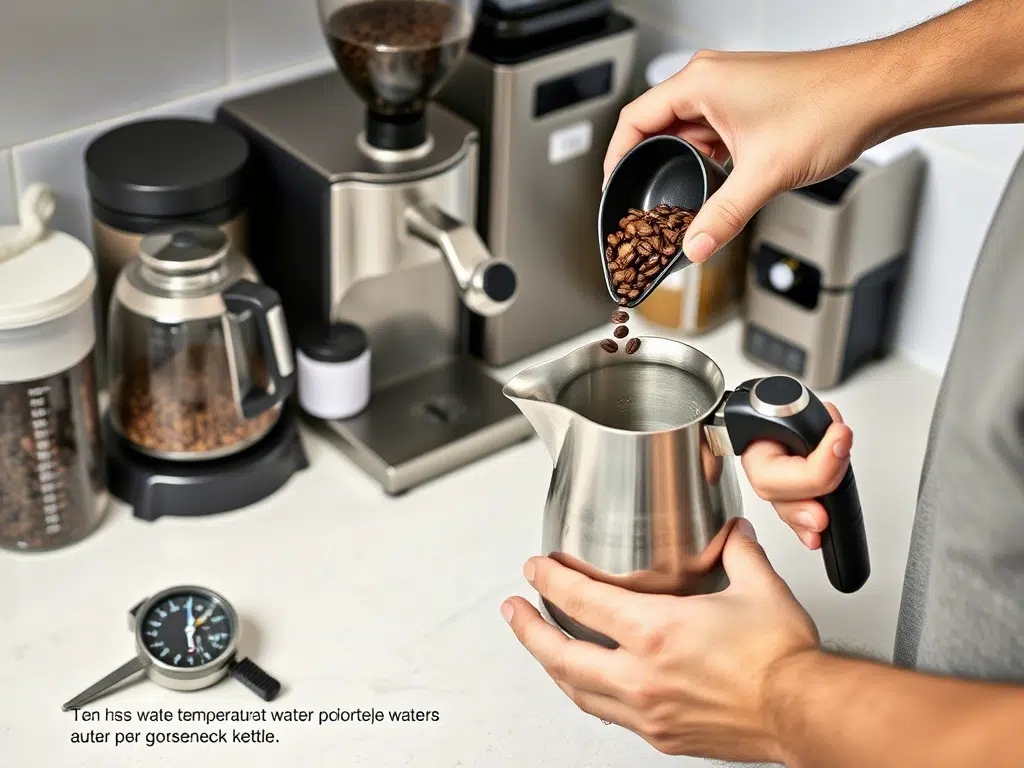
First, start with the right equipment.
You’ll need a pour-over dripper, a kettle with a gooseneck spout, a scale, and a timer.
A gooseneck kettle allows for precise control over the water flow, which is crucial for even extraction.
A scale ensures you measure both the coffee and water accurately, while a timer helps you keep track of the brewing time.
Begin by measuring out the appropriate amount of coffee.
For a typical pour-over, use about 1 gram of coffee for every 15 grams of water.
For example, if you’re making a 300-gram batch of coffee, you’ll need 20 grams of coffee.
Grind the coffee to a medium-fine consistency, similar to table salt.
Next, preheat your dripper and cup by rinsing them with hot water.
This helps maintain the water temperature during brewing and removes any off-flavors.
Discard the rinse water and place the filter in the dripper.
Heat your water to the ideal temperature, typically between 195°F and 205°F.
Too hot, and you risk over-extraction, leading to bitter coffee.
Too cool, and the coffee may taste weak and under-extracted.
Once the water is ready, bloom the coffee by pouring a small amount of water over the grounds to saturate them evenly.
Wait about 30 seconds for the coffee to “bloom,” releasing gases and allowing the water to penetrate the grounds fully.
After blooming, continue pouring water in a circular motion, starting from the center and moving outward.
Aim to saturate all the grounds evenly and maintain a steady flow.
The total brewing time should be around 2 to 3 minutes, depending on the grind size and desired strength.
Adjust the grind size if necessary to achieve the perfect extraction time.
Key Steps for Pour-Over:
- Measure coffee (1:15 ratio)
- Grind to medium-fine consistency
- Preheat dripper and cup
- Heat water to 195°F–205°F
- Bloom the coffee for 30 seconds
- Pour in circular motion, maintaining steady flow
Pour-over coffee is not only delicious but also a meditative practice.
It allows you to connect with the coffee and appreciate the nuances in each cup.
In the next section, we’ll explore the importance of achieving the ideal coffee-to-water ratio for optimal extraction.
Achieving the Ideal Coffee-to-Water Ratio
Getting the right coffee-to-water ratio is crucial for extracting the best flavors from your beans.
The ideal ratio depends on personal preference, but a commonly recommended starting point is 1:15 , meaning 1 gram of coffee for every 15 grams of water.
This ratio provides a balanced and flavorful cup of coffee.
However, you can adjust it based on your taste—using more coffee results in a stronger brew, while less coffee yields a milder cup.
To find your perfect ratio, start with the standard 1:15 and experiment from there.
For instance, if you prefer a stronger cup, try increasing the coffee-to-water ratio to 1:14 or even 1:13.
Conversely, if you like a lighter, more delicate brew, you might reduce the ratio to 1:16 or 1:17.
Keep in mind that altering the ratio also affects the brewing time, so be prepared to tweak that as well.
Consistency is key when adjusting ratios.
Use a scale to weigh both your coffee and water accurately.
This ensures repeatability and helps you fine-tune your brewing process over time.
Additionally, pay attention to the grind size, as finer grounds require more water for the same strength, while coarser grounds need less.
Understanding and controlling the coffee-to-water ratio is essential for achieving the perfect home coffee.
In the next section, we’ll discuss how to control water temperature for optimal extraction.
Controlling Water Temperature for Optimal Extraction

Water temperature plays a pivotal role in coffee brewing, affecting the extraction of flavors and ultimately the taste of your cup.
Using water that’s too hot can lead to over-extraction, resulting in bitter, burnt-tasting coffee.
On the other hand, water that’s too cold won’t extract enough flavor, leaving your coffee weak and underwhelming.
Finding the sweet spot is key to brewing the perfect home coffee.
The ideal water temperature for brewing coffee falls between 195°F and 205°F.
This range allows for optimal extraction, ensuring that the water is hot enough to dissolve the soluble compounds in the coffee grounds but not so hot that it burns them.
If you don’t have a thermometer, a good rule of thumb is to let your kettle rest for about 30 seconds after boiling before pouring it over your coffee grounds.
For pour-over and drip coffee, maintaining a consistent water temperature throughout the brewing process is essential.
Many high-end coffee makers and espresso machines have built-in thermostats to regulate water temperature, but if you’re using a manual method, you’ll need to monitor it closely.
One trick is to use a gooseneck kettle, which allows for precise control over the flow of water, helping to maintain an even temperature.
Water quality also matters. Hard water with high mineral content can negatively impact the taste of your coffee, while filtered water can enhance the clarity and brightness of the flavors.
Consider using a water filter if your tap water has a noticeable taste or smell.
Softened water, however, should generally be avoided as it can strip minerals needed for proper extraction.
By paying attention to water temperature and quality, you can significantly improve the flavor of your coffee.
In the next section, we’ll discuss the importance of maintaining your coffee equipment to ensure consistent and high-quality brews.
Maintaining Your Coffee Equipment
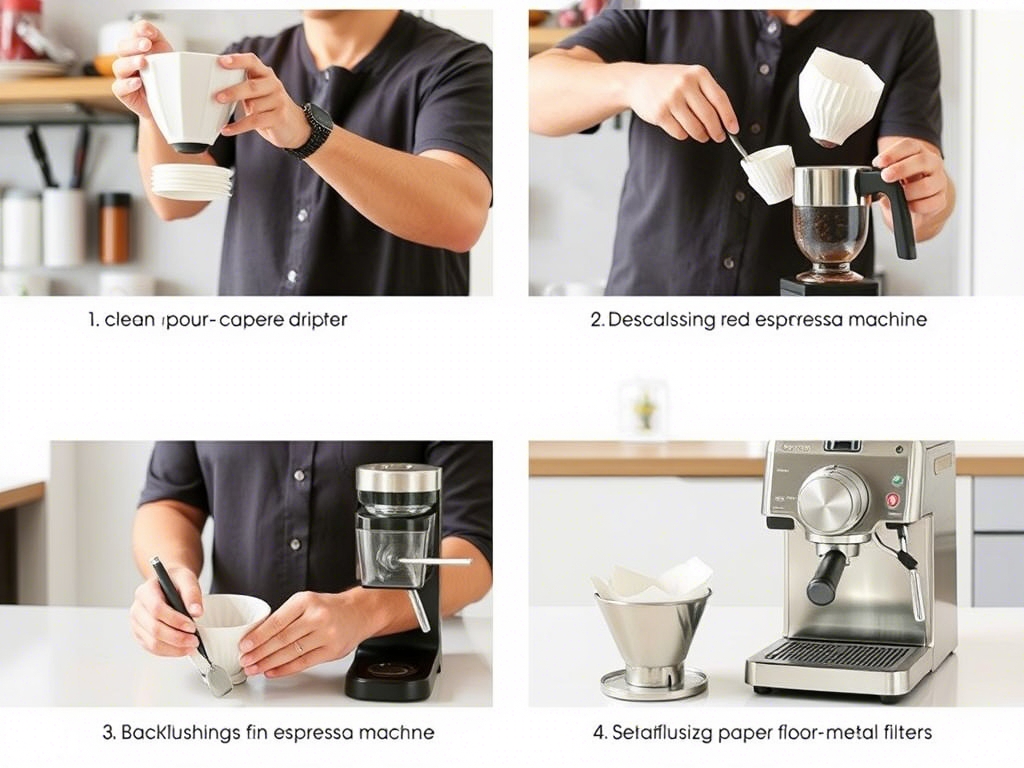
Regular maintenance of your coffee equipment is essential for producing consistently great cups of coffee.
Over time, residues from coffee oils and minerals can build up, affecting the taste and performance of your brewer.
Cleaning your gear regularly will not only extend its lifespan but also ensure that each cup tastes as good as the last.
For pour-over and drip coffee makers, descaling is crucial.
Over time, hard water deposits can accumulate inside the machine, causing poor water flow and uneven extraction.
Most coffee makers come with a built-in descaling cycle, but you can also use a commercial descaler or a mixture of white vinegar and water.
Run the solution through the machine and flush it thoroughly with clean water afterward.
This process should be done every three to 6 months, depending on how frequently you use the machine.
Espresso machines require more specialized care.
They need regular backflushing to remove oils and residues from the group head.
Backflushing involves running water backward through the machine using a blank portafilter with a rubber gasket.
This helps prevent clogs and ensures the machine operates efficiently.
Additionally, wipe down the exterior of the machine daily to prevent oil buildup, which can attract dust and bacteria.
Filters, whether paper or metal, also need attention.
Paper filters should be replaced after each use to prevent the buildup of old coffee oils.
Metal filters, on the other hand, can be washed and reused, but they should be scrubbed thoroughly with a soft brush to remove any residue.
Over time, metal filters can develop a patina that adds subtle flavor notes to your coffee, enhancing its complexity.
Equipment Maintenance Tips:
- Descaling : Every 3-6 months for drip and pour-over machines.
- Backflushing : Regularly for espresso machines.
- Filter Care : Replace paper filters after each use; clean metal filters thoroughly.
- Cleaning : Wipe down machines daily to prevent oil buildup.
Taking care of your coffee equipment shows respect for the craft and ensures that each cup is as enjoyable as the last.
In the next section, we’ll explore how experimentation and refinement can help you further enhance your brewing skills and find the perfect cup for you.
Experimenting and Refining Your Brew
Coffee brewing is an art that requires patience and experimentation.
Even after mastering the basics, there’s always room for improvement.
Refining your brewing process can lead to discovering new flavors and textures that you never thought possible.
Here’s how you can continue to refine your coffee game:.
Start by exploring different coffee beans.
As mentioned earlier, beans from different regions offer unique flavor profiles.
Try single-origin beans from Ethiopia, Brazil, or Colombia, and see how they compare.
You can also experiment with blends, which combine beans from multiple origins to create balanced, complex flavors.
Keep a notebook to jot down your impressions—this will help you remember what you liked or didn’t like about each batch.
Adjusting variables like grind size, brewing time, and coffee-to-water ratio can also yield significant improvements.
For example, if your coffee tastes too bitter, try coarsening the grind or reducing the brewing time.
If it’s too weak, consider using a finer grind or increasing the brewing time.
Each adjustment can lead to a noticeable difference in flavor and body.
Don’t be afraid to try new brewing methods.
While you may have found a method you love, there’s always something new to learn.
For instance, the cold brew method produces a smooth, low-acid coffee that’s perfect for iced coffee lovers.
Alternatively, the AeroPress offers a quick and easy way to make rich, full-bodied coffee with minimal equipment.
Exploring these alternatives can open up a world of possibilities and expand your coffee repertoire.
Tips for Experimentation:
- Try Different Beans : Single-origin vs. blends.
- Adjust Variables : Grind size, brewing time, coffee-to-water ratio.
- Explore New Methods : Cold brew, AeroPress, etc.
- Keep Notes : Record your impressions for future reference.
Finally, involve others in your coffee journey. Sharing your experiments with friends or joining a local coffee club can provide valuable feedback and inspiration.
Sometimes, another set of eyes can help you notice details you might have missed.
Embrace the process of continuous learning and enjoy the journey toward crafting the perfect home coffee .
In the next section, we’ll delve into understanding coffee roast levels and how they influence the flavor of your coffee.
Understanding Coffee Roast Levels
Understanding coffee roast levels is essential for unlocking the full potential of your beans.
Roast levels not only affect the flavor and aroma of your coffee but also determine its body, acidity, and overall character.
There are three primary roast levels: light, medium, and dark, each offering distinct qualities that cater to different palates.
Light Roast : Lightly roasted beans are characterized by their bright, acidic, and fruity flavors.
The roasting process stops before the beans reach their maximum development, preserving more of their natural acidity and complexity.
This results in a lighter body and a higher caffeine content.
Light roasts are perfect for those who enjoy delicate, nuanced flavors and prefer a brighter, more refreshing cup.
Examples include Ethiopian Yirgacheffe, known for its floral and citrus notes.
Medium Roast : Medium roasts strike a balance between the brightness of light roasts and the richness of dark roasts.
These beans are roasted until they reach a caramelization point, developing a smoother, more balanced flavor profile.
Medium roasts typically have a medium body and moderate acidity, making them versatile and suitable for a wide range of brewing methods.
Colombian Supremo is a popular choice for medium roasts, offering a balanced mix of sweetness, acidity, and body.
Dark Roast : Dark roasts are roasted until they reach a nearly black color, with a glossy surface and a pronounced oily sheen.
The extended roasting time leads to a fuller body, lower acidity, and a richer, smokier flavor.
Dark roasts are often associated with bold, intense coffees that appeal to those who enjoy a robust, full-bodied cup.
Indonesian Sumatra is a classic example of a dark roast, with earthy, spicy, and smoky undertones.
Comparison of Roast Levels:
| Roast Level | Flavor Profile | Acidity | Body | Caffeine Content |
| Light | Bright, fruity, floral | High | Light | High |
| Medium | Balanced, nutty, caramelized | Moderate | Medium | Moderate |
| Dark | Rich, smoky, bittersweet | Low | Full | Low |
Experimenting with different roast levels can help you discover what suits your taste best.
Some prefer the brightness of light roasts, while others enjoy the richness of dark roasts.
Medium roasts offer a harmonious balance, making them a safe bet for most occasions.
Regardless of your preference, choosing the right roast level is crucial for crafting the perfect home coffee .
How Water Quality Affects Coffee Taste
Water quality is often overlooked but plays a significant role in the taste of your coffee.
The type of water you use can either enhance or detract from the flavor of your beans.
Understanding how water interacts with coffee can help you achieve a more enjoyable cup.

Mineral Content : Water contains dissolved minerals like calcium and magnesium, which affect the extraction process.
Hard water, with higher mineral content, can enhance the extraction of flavors, resulting in a more robust and balanced cup.
However, excessively hard water can lead to a bitter taste due to over-extraction.
Conversely, soft water, which lacks these minerals, can produce a flat, lackluster cup.
Filtered water strikes a good balance, removing impurities while retaining beneficial minerals.
pH Level : The pH of your water can also impact the taste of your coffee.
Water with a neutral pH (around 7) is ideal for coffee brewing.
Acidic water (low pH) can make your coffee taste sour, while alkaline water (high pH) can dull the flavors.
Using water with a slightly acidic pH can enhance the brightness and clarity of your coffee, especially when paired with light or medium roast beans.
Temperature : As discussed earlier, the temperature of the water is critical for optimal extraction.
Water that’s too hot can burn the coffee, leading to bitterness, while water that’s too cold won’t extract enough flavor, resulting in a weak cup.
Most brewing methods recommend water heated to between 195°F and 205°F for the best results.
Using high-quality water can make a noticeable difference in the flavor of your coffee.
Investing in a water filter or using bottled spring water can help you achieve the best results.
In the next section, we’ll explore the best coffee brewing equipment for home use, helping you find the tools that suit your needs and preferences.
Best Coffee Brewing Equipment for Home Use
Selecting the right coffee brewing equipment is crucial for achieving consistent and high-quality results.
With so many options available, it can be overwhelming to choose the best one for your home brewing setup.
Here’s a breakdown of some of the top coffee brewing equipment to help you make an informed decision.
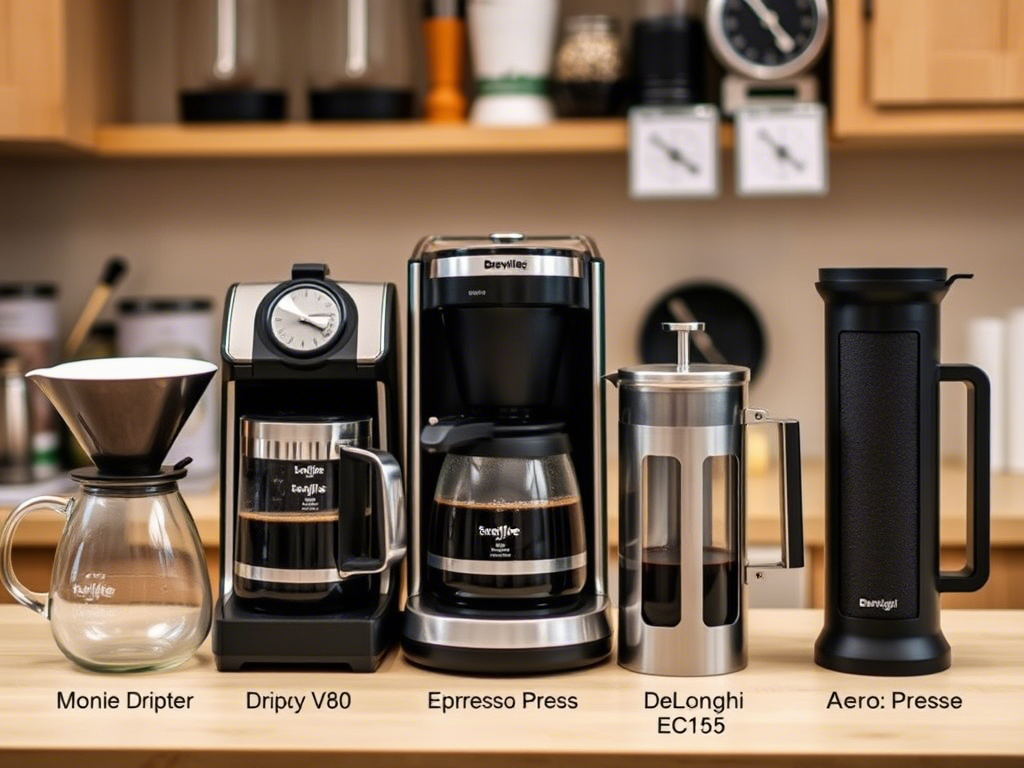
Pour-Over Dripper :
Pour-over drippers, such as the Hario V60 or Chemex, offer precision and control over the brewing process.
They allow you to manually pour water over the coffee grounds, giving you the flexibility to adjust the flow and temperature for optimal extraction.
Pour-over coffee is known for its clean, nuanced flavors and is a favorite among coffee enthusiasts.
These drippers are relatively inexpensive and easy to use, making them a great choice for beginners and experts alike.
Drip Coffee Maker
Drip coffee makers are convenient and easy to use, making them a popular choice for busy households.
Look for models with programmable features and thermal carafes to maintain the coffee’s temperature for longer periods.
High-end drip machines, like those from Breville or Bonavita, offer precise temperature control and even water distribution, ensuring a consistent and flavorful brew.
These machines are ideal for those who prioritize convenience and reliability.
Espresso Machine
If you enjoy café-style drinks like lattes and cappuccinos at home, an espresso machine is a worthwhile investment.
Entry-level semi-automatic machines, such as the DeLonghi EC155, offer a good balance of functionality and affordability.
For those who want more control, fully automatic machines like the Breville Barista Express provide programmable settings and milk frothing capabilities.
Espresso machines require more maintenance but reward you with rich, concentrated shots of coffee.
French Press
The French press is a simple yet effective brewing method that produces a rich, full-bodied cup. It’s perfect for those who enjoy a robust flavor and don’t mind a bit of sediment in their coffee.
French presses are affordable and portable, making them a great option for camping trips or travel. They are also easy to clean and require minimal equipment, aside from a grinder and hot water.
AeroPress
The AeroPress is a compact, versatile brewing device that produces a smooth, rich cup of coffee. It combines elements of immersion and pressure brewing, offering a unique extraction process.
The AeroPress is quick and easy to use, and its portability makes it ideal for travel or office use. It’s also a favorite among coffee enthusiasts for its ability to produce a clean, flavorful cup with minimal effort.
Best Coffee Brewing Equipment
- Pour-Over Dripper : Precision, control, clean flavors.
- Drip Coffee Maker : Convenience, programmable features.
- Espresso Machine : Café-quality drinks, milk frothing.
- French Press : Robust flavor, simple, portable.
- AeroPress : Quick, versatile, smooth, rich.
Each piece of equipment has its strengths and weaknesses, so choose based on your preferences and lifestyle.
Whether you’re a casual coffee drinker or a dedicated coffee connoisseur, having the right tools can elevate your coffee experience.
In the next section, we’ll explore how to make coffee without a coffee maker, providing alternative methods for those who prefer simplicity or are traveling.
How to Make Coffee Without a Coffee Maker
If you find yourself without a coffee maker or prefer simpler brewing methods, there are still plenty of ways to enjoy a great cup of coffee at home.
These methods require minimal equipment and can be surprisingly effective.
Here are some of the easiest and most accessible ways to brew coffee without a coffee maker.
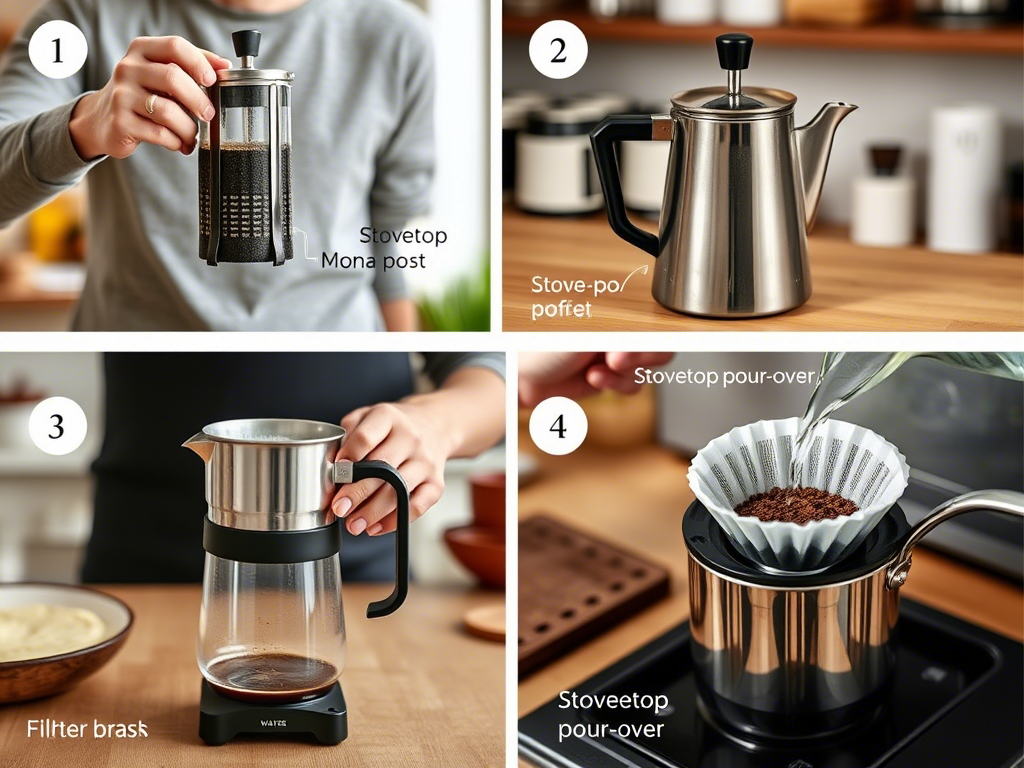
1. French Press
The French press is one of the simplest and most versatile brewing methods. All you need is a French press, coarsely ground coffee, and hot water.
Start by heating water to around 195°F to 205°F . Place the coffee grounds in the French press, pour the hot water over them, and stir gently to ensure even saturation.
Let the coffee steep for about 4 minutes, then press the plunger down slowly to separate the grounds from the liquid. Pour and enjoy your rich, full-bodied coffee.
Moka Pot
A Moka pot, also known as a stovetop espresso maker, is another excellent option for brewing coffee without a coffee maker.
It works by forcing hot water through coffee grounds using steam pressure.
Fill the bottom chamber with water, add coarsely ground coffee to the filter basket, and screw the top onto the pot.
Place the Moka pot on the stove over medium heat.
Once the coffee starts to brew, listen for a hissing sound, indicating that the coffee is ready.
Remove from heat and pour the coffee into a mug.
Moka Pot Brewing Tips
- Water Level : Ensure water doesn’t exceed the safety valve.
- Grind Size : Coarse grind for optimal extraction.
- Heat Control : Use medium heat to prevent burning.
3. Stovetop Pour-Over
If you have a saucepan or a pot with a pour spout, you can replicate the pour-over method on the stovetop.
Heat water to the ideal temperature and pour it over a filter placed in a strainer.
Add your coffee grounds and pour the hot water in a circular motion, allowing the coffee to drip into a waiting vessel below.
This method mimics the precision of a traditional pour-over but uses readily available kitchen tools.
Stovetop Pour-Over Steps
- Heat water to 195°F–205°F.
- Place a filter in a strainer.
- Add coffee grounds (1:15 ratio).
- Pour water in a circular motion.
- Let it drip into a carafe.
By using these methods, you can still enjoy a great cup of coffee even when you don’t have a dedicated coffee maker.
In the next section, we’ll explore the differences between cold brew and iced coffee, two popular choices for those who prefer their coffee chilled.
Cold Brew vs. Iced Coffee: What’s the Difference?
Both cold brew and iced coffee are refreshing options for those who prefer their coffee chilled, but they differ in how they are made and their resulting flavors.
Understanding the distinction between these two methods can help you choose the one that best suits your taste.
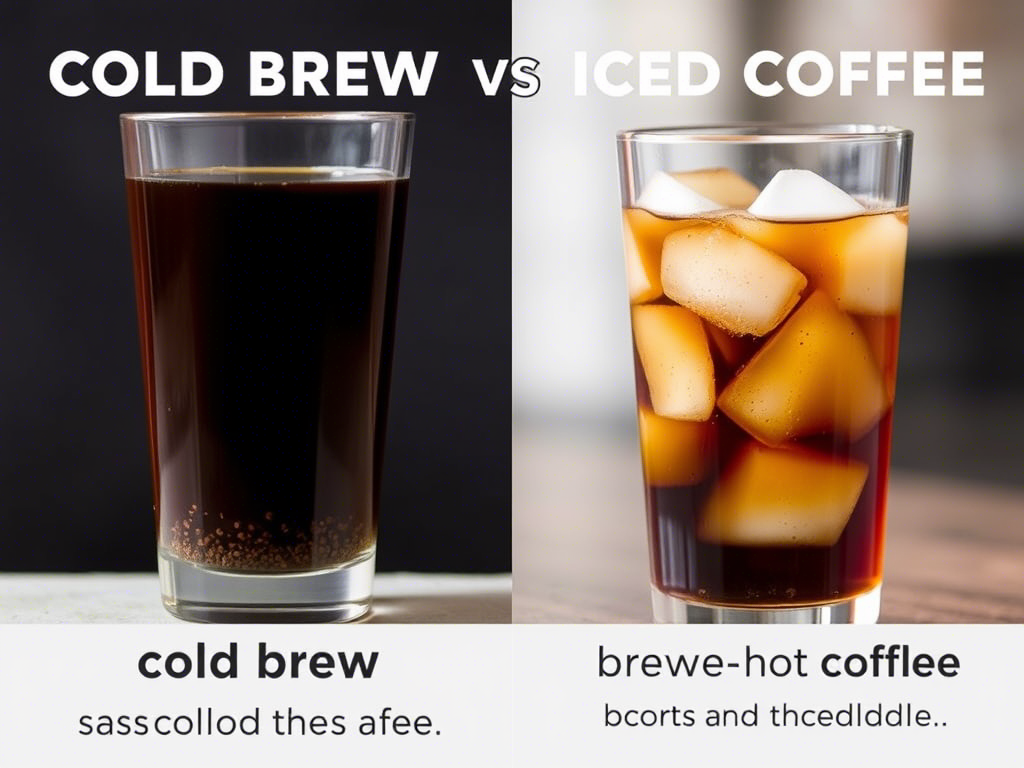
Cold Brew
Cold brew coffee is made by steeping coarsely ground coffee in cold water for an extended period, usually 12 to 24 hours.
The long steeping time extracts the coffee’s flavors gently, resulting in a smooth, less acidic, and naturally sweeter cup.
Because no heat is involved, cold brew retains more of the coffee’s natural oils and flavors, making it a favorite for those who enjoy a milder, more approachable coffee.
Iced Coffee
Iced coffee, on the other hand, is brewed using hot water, just like regular coffee.
After brewing, the coffee is cooled down and served over ice.
This method preserves the intensity and complexity of the coffee’s flavor profile, but it can be more acidic due to the high heat used in brewing.
Iced coffee is often enjoyed with added milk, sugar, or flavored syrups to balance its bold taste.
Key Differences:
- Cold Brew : Steeped in cold water, smooth, less acidic, naturally sweet.
- Iced Coffee : Brewed with hot water, then cooled, bold, more acidic.
Flavor Profiles
Cold brew tends to have a smoother, sweeter, and less bitter taste, making it a great option for those who prefer a gentler coffee experience.
Iced coffee, however, offers a more robust and complex flavor, with a higher caffeine content.
Both methods have their merits, and the choice between them often comes down to personal preference.
Cold Brew vs. Iced Coffee:
| Feature | Cold Brew | Iced Coffee |
| Brewing Method | Steeped in cold water | Brewed with hot water, then cooled |
| Flavor Profile | Smooth, less acidic, naturally sweet | Bold, more acidic |
| Caffeine Content | Lower | Higher |
| Preparation Time | 12-24 hours | Immediate |
Whether you prefer the smooth, mellow taste of cold brew or the bold, intense flavor of iced coffee, both options provide a refreshing way to enjoy your coffee on a hot day.
In the next section, we’ll explore how to froth milk at home without an espresso machine, a skill that can elevate your coffee-drinking experience.
How to Froth Milk at Home Without an Espresso Machine
Frothing milk at home can transform your coffee from ordinary to extraordinary.
While an espresso machine makes the process easier, it’s entirely possible to achieve creamy, frothy milk using basic kitchen tools.
Here are a few methods to help you froth milk at home without an espresso machine.
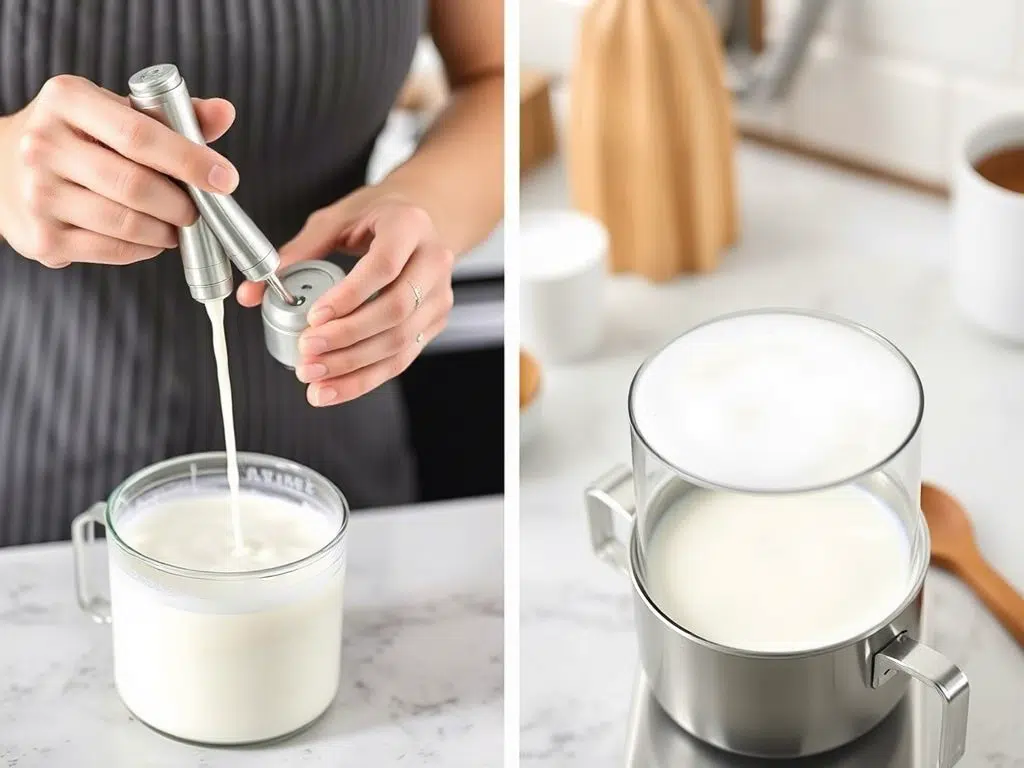
1. Using a Milk Frother
A handheld milk frother is a simple and affordable tool for frothing milk.
Fill a heat-safe container with your preferred milk (dairy, almond, oat, etc.) and heat it to about 140°F to 150°F.
Once heated, insert the frother and blend the milk until it becomes frothy and aerated.
The frother creates tiny air bubbles, giving the milk a velvety texture and a light foam on top.
2. Microwave Method
If you don’t have a frother, you can use your microwave to froth milk. Pour milk into a microwave-safe container and heat it on high for about 30 seconds.
Stop the microwave and shake the container vigorously to incorporate air.
Continue microwaving in short bursts (about 10 seconds each) and shaking until the milk is frothy. Be careful not to overheat the milk, as it can curdle.
Microwave Frothing Steps
- Heat milk for 30 seconds.
- Shake vigorously to incorporate air.
- Microwave in 10-second bursts.
- Repeat until frothy.
3. Using a Blender
A blender is another effective tool for frothing milk. Pour milk into a blender and blend on high speed for about 30 to 45 seconds.
The high-speed blades create tiny air bubbles, resulting in a frothy, creamy texture. For extra smoothness, you can strain the frothed milk through a fine mesh sieve.
Blender Frothing Tips:
- Blender Speed : High speed for frothing.
- Straining : Optional for extra smoothness.
- Time : Blend for 30-45 seconds.
By mastering these methods, you can enjoy perfectly frothed milk at home, adding a luxurious touch to your coffee.
In the next section, we’ll explore how to make specialty coffee at home, taking your coffee-making skills to the next level.
How to Make Specialty Coffee at Home
Making specialty coffee at home can elevate your coffee experience to new heights.
Specialty coffee refers to high-quality beans that meet strict standards for taste, aroma, and origin.
With the right techniques and equipment, you can recreate café-quality drinks in the comfort of your own kitchen.
Here’s how to make some of the most popular specialty coffee drinks at home.
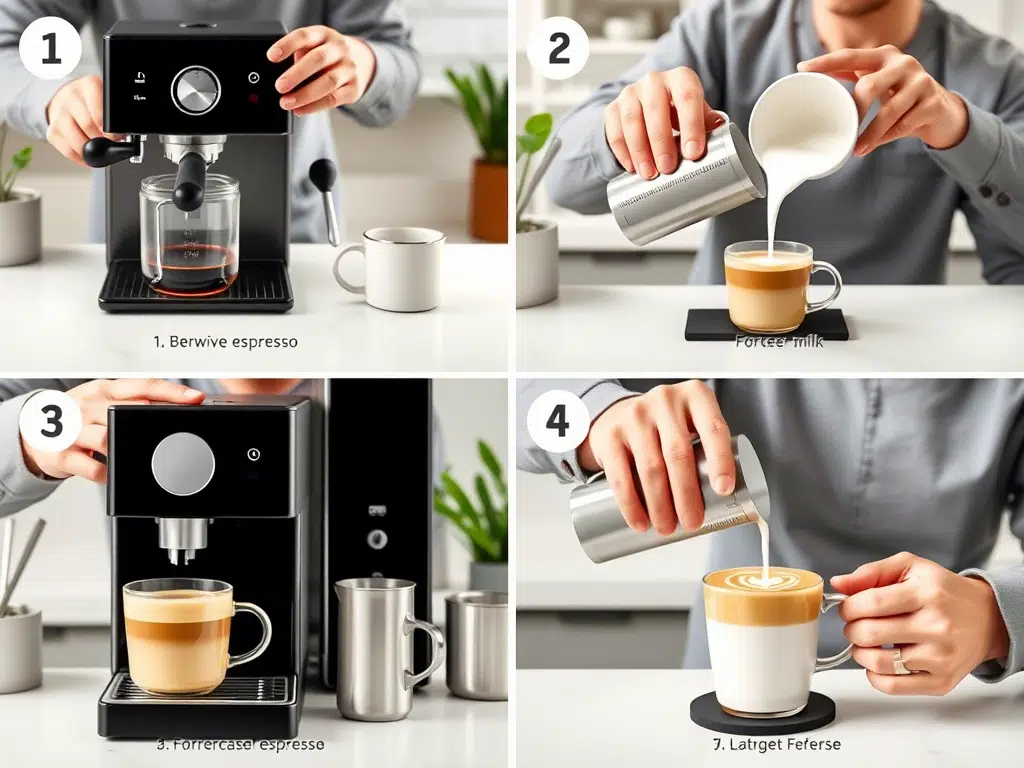
1. Latte
A latte is a classic coffee drink made with espresso and steamed milk.
To make a latte at home, start by brewing a shot of espresso using your preferred method.
If you don’t have an espresso machine, you can use a Moka pot or a French press to simulate the concentrated flavor.
Next, heat your milk using a milk frother or a microwave, as described earlier.
Steam the milk until it’s warm and frothy, then pour it over the espresso.
Finish by drizzling a little milk in a decorative pattern on top, known as latte art.
2. Cappuccino
A cappuccino is similar to a latte but with a thicker layer of foam.
Begin by making a shot of espresso. Then, heat and froth your milk to create a dense foam.
Pour the espresso into a mug, followed by the steamed milk, and finish with a generous layer of foam.
For an authentic touch, sprinkle a bit of cinnamon or cocoa powder on top.
Cappuccino Tips:
- Espresso : 1-2 shots
- Steamed Milk : 6 oz
- Foam : Thick and creamy
- Toppings : Cinnamon or cocoa powder
3. Macchiato
A macchiato is a simplified version of a latte, featuring a small amount of steamed milk in an espresso shot.
Start with a shot of espresso, then add a spoonful of frothed milk.
This drink highlights the boldness of the espresso while offering a hint of creaminess.
For a sweeter version, you can drizzle a bit of caramel or chocolate syrup on top.
Macchiato Steps:
- Brew 1-2 shots of espresso.
- Froth a small amount of milk.
- Add frothed milk to the espresso.
- Optionally, drizzle caramel or chocolate syrup.
4. Affogato
An affogato is a dessert-inspired coffee drink made by pouring a shot of espresso over a scoop of vanilla ice cream.
The contrast between the hot coffee and the cold ice cream creates a delightful combination.
Garnish with a sprinkle of cocoa powder or a drizzle of chocolate sauce for added indulgence.
Affogato Tips:
- Espresso : 1-2 shots
- Ice Cream : Vanilla or other flavors
- Garnishes : Cocoa powder, chocolate sauce
By mastering these specialty coffee drinks, you can enjoy café-quality beverages at home.
In the next section, we’ll address common coffee brewing mistakes and how to avoid them, ensuring your coffee-making process is as smooth as possible.
How to Avoid Common Coffee Brewing Mistakes
Even experienced coffee brewers can fall into common pitfalls that affect the quality of their coffee.
By recognizing and avoiding these mistakes, you can consistently brew a better cup.
Here are some of the most frequent errors and how to fix them.
1. Using Old or Poor-Quality Beans
Freshness is crucial for great coffee. Always use high-quality, freshly roasted beans. Stale beans can result in a dull, flat flavor.
Store your beans in an airtight container in a cool, dry place, and consider portioning them out to maintain freshness.
“Freshness is the first flavor.” – Kenneth Davids, Coffee Review
2. Incorrect Water Temperature
Water that’s too hot can burn the coffee, leading to a bitter taste, while water that’s too cold won’t extract enough flavor.
Aim for water between 195°F and 205°F . Use a thermometer or a kettle with a temperature control feature to ensure accuracy.
3. Improper Grind Size
Using the wrong grind size for your brewing method can lead to over-extraction or under-extraction.
Fine grounds are suitable for espresso, while medium-fine grounds work well for pour-over and drip coffee.
Coarse grounds are best for French press. Adjust the grind size based on your brewing method to achieve optimal extraction.
4. Neglecting Equipment Maintenance
Dirty or poorly maintained equipment can affect the taste of your coffee. Regular cleaning and descaling of your coffee maker, grinder, and other tools are essential.
Clean your equipment after each use and perform deep cleans every few months to ensure consistent quality.
Common Coffee Brewing Mistakes:
| Mistake | Solution |
| Using old beans | Buy fresh, high-quality beans |
| Incorrect water temperature | Use 195°F–205°F |
| Improper grind size | Adjust grind size for brewing method |
| Neglecting equipment maintenance | Clean and descale regularly |
By avoiding these common mistakes, you can improve the quality of your coffee and enjoy a more satisfying brewing experience.
In the next section, we’ll explore the best coffee beans for home brewing, helping you select the perfect beans for your taste preferences.
Best Coffee Beans for Home Brewing
Choosing the right coffee beans is the cornerstone of brewing a great cup of coffee.
Different beans offer unique flavor profiles, so it’s essential to select beans that align with your personal taste.
Here are some of the best coffee beans for home brewing, categorized by roast level and origin.
1. Light Roast: Ethiopian Yirgacheffe
Ethiopian Yirgacheffe is renowned for its bright, fruity, and floral notes. This light roast preserves the bean’s natural acidity and complexity, making it ideal for those who enjoy delicate, nuanced flavors.
The clean, crisp taste pairs well with pour-over and drip brewing methods.
2. Medium Roast: Colombian Supremo
Colombian Supremo is a balanced, medium roast with a smooth, nutty flavor profile.
It offers a harmonious blend of sweetness, acidity, and body, making it versatile for various brewing methods. Its moderate caffeine content and rich aroma make it a favorite for everyday brewing.
Colombian Supremo
- Origin : Colombia
- Flavor Profile : Nutty, balanced, smooth
- Best For : Drip, French press, pour-over
3. Dark Roast: Indonesian Sumatra
Indonesian Sumatra is a full-bodied, dark roast with earthy, spicy, and smoky undertones.
This robust coffee is perfect for those who enjoy a bold, intense flavor. It pairs well with French press and espresso brewing methods, delivering a rich, satisfying cup.
Indonesian Sumatra
- Origin : Indonesia
- Flavor Profile : Earthy, spicy, smoky
- Best For : French press, espresso
4. Single-Origin vs. Blends
Single-origin beans come from a specific region and offer distinct, pure flavors. Blends, on the other hand, combine beans from multiple origins to create a balanced, complex taste.
Choose single-origin beans for a unique flavor experience or blends for a more harmonious profile.
Single-Origin vs. Blends
| Type | Flavor Profile | Best For |
| Single-Origin | Distinct, pure flavors | Unique flavor experience |
| Blends | Balanced, complex flavors | Harmonious profile |
By selecting the right beans, you can tailor your coffee to your personal preferences and brewing method.
In the next section, we’ll explore eco-friendly coffee brewing practices to help you reduce waste and minimize your environmental impact.
Eco-Friendly Coffee Brewing: Reduce Waste at Home
Reducing waste is an essential aspect of sustainable living, and coffee brewing offers several opportunities to minimize your environmental footprint.
From sourcing beans to disposing of equipment, there are many ways to make your coffee routine more eco-friendly.
Here are some practical tips to help you brew coffee sustainably at home.
1. Choose Sustainable Coffee Brands
Opt for coffee brands that prioritize sustainability and ethical practices. Look for certifications like Fair Trade, Rainforest Alliance, or Organic.
These labels ensure that the coffee is grown using environmentally friendly methods and that farmers receive fair compensation.
Supporting sustainable brands not only benefits the planet but also promotes social responsibility.
2. Reuse and Recycle Filters
Paper coffee filters are widely used but can contribute to waste. Consider switching to reusable cloth filters for pour-over or metal filters for French press.
Cloth filters are washable and can be reused multiple times, significantly reducing waste. If you prefer paper filters, look for compostable options made from unbleached paper.
Many municipalities offer composting programs that accept these filters.
Filter Alternatives
- Reusable Cloth Filters : Washable and long-lasting.
- Metal Filters : Durable and reusable.
- Compostable Paper Filters : Biodegradable and environmentally friendly.
3. Reduce Single-Use Packaging
Single-use packaging, such as disposable cups and pods, generates a significant amount of waste.
Instead, opt for reusable containers and bulk purchasing. Many coffee shops offer discounts for bringing your own reusable cup.
For coffee pods, consider using refillable systems that allow you to use your own grounds in a reusable pod.
Reduce Single-Use Packaging
- Reusables : Bring your own coffee cup to cafes.
- Bulk Buying : Purchase beans in bulk to reduce packaging.
- Refillable Pods : Use reusable pods with your own grounds.
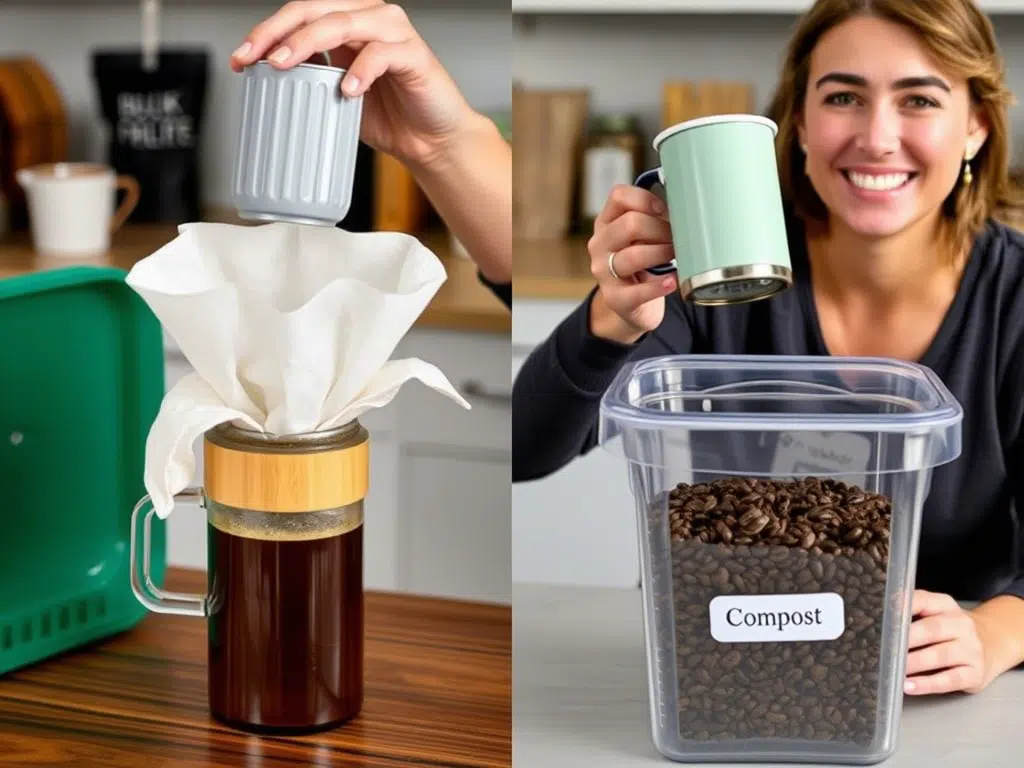
4. Compost Coffee Grounds
Coffee grounds are rich in nitrogen and can be a valuable addition to your compost pile. They help accelerate decomposition and improve soil health.
You can also repurpose coffee grounds in your garden by using them as mulch or fertilizer.
Just ensure the grounds are well-balanced with carbon-rich materials like leaves or straw.
By implementing these eco-friendly practices, you can significantly reduce waste and minimize your environmental impact.
In the next section, we’ll delve into the science behind coffee brewing, focusing on extraction and acidity, to help you understand the chemistry that makes your coffee taste great.
The Science Behind Coffee Brewing: Extraction & Acidity
Understanding the science behind coffee brewing can help you fine-tune your process and achieve the best possible flavor.
Two key factors to focus on are extraction and acidity. Let’s explore how these elements interact to create a delicious cup of coffee.

1. Extraction: The Process of Flavor Release
Extraction refers to the process of dissolving soluble compounds from coffee grounds into water.
These compounds include sugars, acids, oils, and other flavor molecules. The goal is to extract just the right amount of these compounds to create a balanced and flavorful cup of coffee.
Over-extraction can lead to bitterness, while under-extraction results in a weak and watery taste.
To achieve optimal extraction, you need to control several variables:
- Grind Size : Finer grounds increase surface area, promoting faster extraction.
- Water Temperature : Between 195°F and 205°F is ideal for most brewing methods.
- Contact Time : The duration the water stays in contact with the grounds.
- Agitation : Stirring or pouring in a circular motion helps ensure even extraction.
2. Acidity: The Key to Brightness and Flavor
Acidity is often misunderstood as a negative trait, but in coffee, it contributes to the brightness and liveliness of the flavor.
Acids in coffee, such as citric acid, malic acid, and chlorogenic acid, are responsible for the fruitiness and complexity of the taste.
The level of acidity varies depending on the roast level and origin of the beans.
Acidity in Different Roast Levels
| Roast Level | Acidity Level | Flavor Characteristics |
| Light | High | Bright, fruity, floral |
| Medium | Moderate | Balanced, nutty |
| Dark | Low | Smoky, bittersweet |
Balancing acidity is crucial for a pleasant cup. Too much acidity can make the coffee taste sour, while too little can result in a dull, flat flavor.
Adjusting the grind size, brewing time, and water temperature can help you find the right balance.
For example, using a finer grind or a shorter brewing time can reduce acidity, while a coarser grind or a longer brewing time can enhance it.
3. The Role of Water Chemistry
Water plays a significant role in coffee brewing, influencing both extraction and acidity.
The mineral content of water, particularly calcium and magnesium, affects how effectively it dissolves the soluble compounds in coffee.
Hard water, with higher mineral content, enhances extraction, while soft water, lacking these minerals, can produce a weaker cup.
Filtering your water can help remove impurities while retaining beneficial minerals.
Water Chemistry
- Hard Water : Enhances extraction, higher mineral content.
- Soft Water : Produces weaker coffee, lacks minerals.
- Filtered Water : Removes impurities, retains beneficial minerals.
By understanding the science behind extraction and acidity, you can make more informed decisions about your brewing process.